Selenium Grid is a powerful tool for testing web applications across browsers and operating systems, but incorporating it into a Continuous Integration pipeline can be frustrating. Integrating the Grid with a CI/CD server is complex, and a misstep during setup can lead to unreliable test errors, and down that path lies madness. Here at CirrusLabs, we use the Selenium Grid plugin for Jenkins to quickly execute our UI tests on every build against multiple operating systems and browsers, so front-end bugs are squashed early.

The Selenium Grid plugin turns the Jenkins server into a Selenium Grid Hub, making it easy to turn Jenkins Slaves into Selenium Grid Nodes. This enables easy test execution on any machines connected to your Jenkins server.
1) Installation
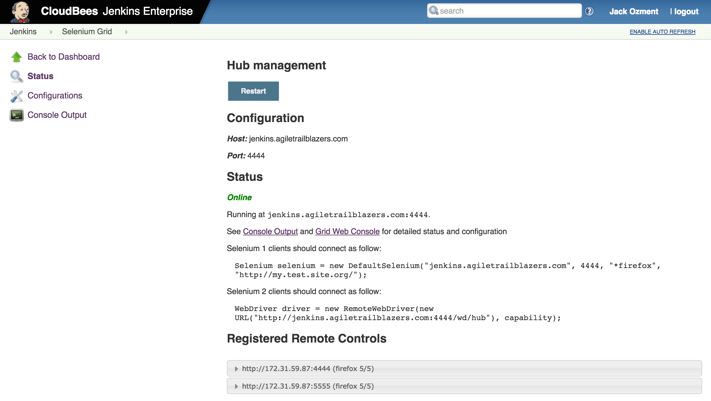
Installation is easy: just search for "Selenium Grid" on Jenkins' "Manage Plugins" screen. The plugin adds a “Selenium Grid” option to the sidebar of the Jenkins dashboard. This screen gives an overview of the status of the Hub, such as console output, and will list any connected Nodes. Most importantly, it lists the URL needed in your Selenium test code to utilize the Grid: you’ll need this in your Web Driver declaration in your test code.

2) Creating a Node Configuration
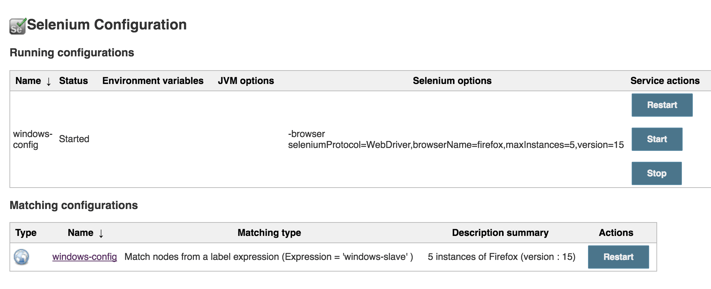
To set up your first Node, navigate to “Configurations” in the sidebar. This page lists all your configurations for Selenium Nodes. These configurations are used to define options for each Node, such as what browsers are present, and where their binaries are stored. For now, select “New Configuration”. The default options on this screen should be fine for your first Node, but you may prefer to match by a label to specify which Jenkins Slave this configuration is for. The same goes for the browsers: by default, the configuration will allow for 5 instances of Firefox, 5 instances of Chrome, and 1 instance of Internet Explorer. For more advanced configuration options, you can attach a JSON configuration file.

3) Launching a Node
Once you have a configuration, navigate to “Nodes Matching Configuration”. This screen lists any available Jenkins Slaves that match your configurations; currently, it should list any Jenkins slaves that match the configuration you just made. Now you can connect a Node to the Selenium Hub using the configuration. Click on the name of the slave you’d like to run Selenium Tests on, and click the “Start” button to enable it as a Selenium Node.

You should now see the Node listed on the main Selenium Grid plugin page. If it isn’t there, you can check the Selenium Grid console output or RDP into the Slave to diagnose the issue. If you’re using a remote network, make sure that the Jenkins server and slave allow traffic on the ports you’re using for Selenium Grid.

Now, your Selenium tests connected to your Grid URL will be dynamically allocated to your Jenkins Slave, or extend your Grid by launching additional Slaves with your configuration, allowing for quick test execution in multiple environments.
Incorporating Selenium Grid into your Jenkins CI/CD pipeline leads to faster test execution on more environments, laying the groundwork for better testing, and a better final product.
Learn more about modernized technology here:
Interested in training to help advance your agile journey? Click the button to view our current list of public training courses! Use code BLOG10 for 10% off!

