JIRA Portfolio is a powerful tool which provides an easy way to manage one or more teams' backlogs and schedule work for months at a time. Portfolio for JIRA 2.0, which was just recently released, brings many useful changes including an easy startup wizard to create a new plan, powerful forecasting tools, and a much tighter integration with your JIRA Boards. Learning to use Portfolio 2 could be a challenge for both experienced Portfolio users as well as JIRA users thinking of trying Portfolio for the first time. Either way, this guide will walk you through setting up and getting started with Portfolio 2.
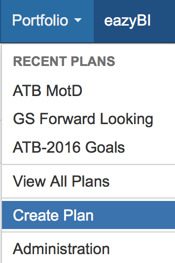
To install or upgrade your Portfolio instance, log in to the JIRA Administrator console and click "Add-ons" in the top navigation. If you have never used Portfolio before, click "Find New Add-ons" and search for Portfolio, and start your free trial. If you just need to update your version of Portfolio, click "Manage Add-ons", find it in the list, and click update. Note that there may be additional add-ons used by Portfolio, such as "Portfolio Team Management" which, in our experience, were also updated automatically. Keep an eye out for compatibility issues just in case.One thing that is not so great off the bat is that existing plans can continue to be used, but will not have any of the Portfolio 2 features and there is currently no way to upgrade your plan; you have to recreate it from scratch. Luckily, JIRA Portfolio 2.0 makes it much easier to set up a new plan and have it synchronize with JIRA. The first step is to click "Create Plan" under "Portfolio" in the header navigation.
One of the best new features in JIRA Portfolio 2 is the Create Plan Wizard, which makes life significantly easier when creating a plan. In the previous versions, you had to manually find and import whatever issues you wanted to bring into your plan, which was tedious and cumbersome. Now, however, when you create a plan, you link the plan to one or more boards. This is a major shift in how you use Portfolio 2.0, it is now much more closely linked to your JIRA board. You no longer have to track work separately in Portfolio and JIRA, it is all linked together. There are also options to connect directly to a project or filter, if you do not want to use a board. If you previously used Portfolio 1 and had a bunch of epics and stories that were only in your plan, you will need to push them all to a JIRA board in order to bring them into a Portfolio 2 plan.
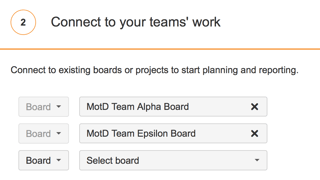 The wizard brings you through screens to select which releases, and even which individual issues from the boards you want to import. This allows you to filter out extraneous work that may not be relevant to your plan, and get an aggregate view of multiple teams or projects concurrently. When you get through the wizard, you enter the new "Scope" view, which is somewhat similar to the "Backlog" view in previous versions of Portfolio, but flipped upside down and more powerful.
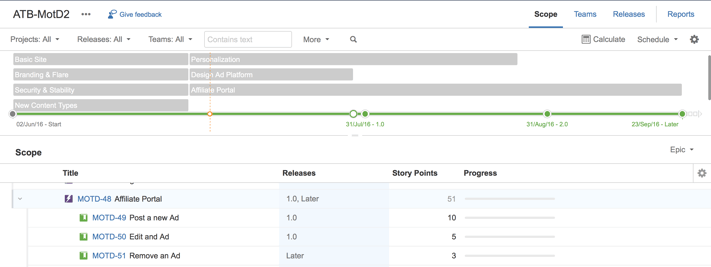
At the bottom of the screen, you can see all of the epics in your JIRA board, as well as all of the stories / issues each contained; any stories which did not have an Epic in JIRA are grouped under "Issues Without Parent Epic." Use the cog wheel to adjust which columns are displayed, which can customize this display to be the most useful to your organization. The top of the screen shows a condensed schedule view, showing a general time line of how long it will take to complete all of the work in your backlog. Use the cog wheel here to modify how the schedule is color coded and broken up to gain more insight about your schedule.
A powerful feature in Portfolio 2 is that, when you make any changes in Portfolio, they are not directly committed to your JIRA board. Instead, a warning is displayed near the name of the board which warns there are uncommitted changes.
 Clicking the warning allows you to review each change made and only commit the changes you want.
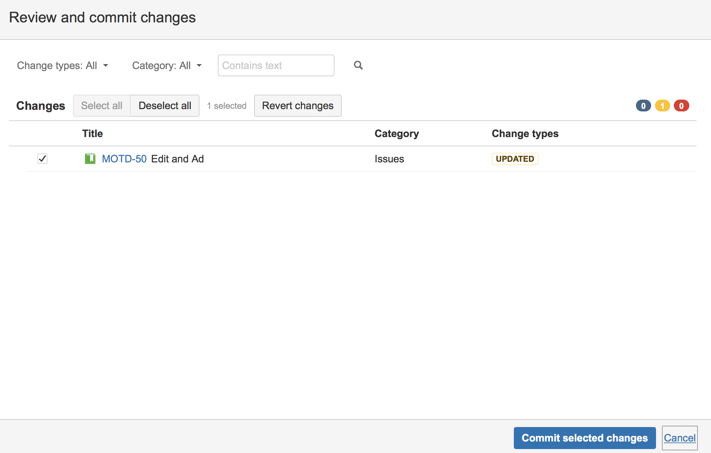
This creates a powerful sandbox you can use to play out What-If scenarios, without affecting your actual backlog in JIRA. You can see how changing a release date or reassigning priorities might affect your schedule before any changes are pushed to your boards.
At this point, you are ready to start using your new plan for your backlog and forecasting. However, there is another setup step which may be useful, depending on how you use Portfolio, which is modifying your story hierarchy levels. This is a big change from previous versions which practically made you to create Initiatives to group your epics. This feature lets you customize how your stories are organized to be the most useful to your organization. Unfortunately, the hierarchy is system wide and affects all plans (except classic Portfolio 1 plans).
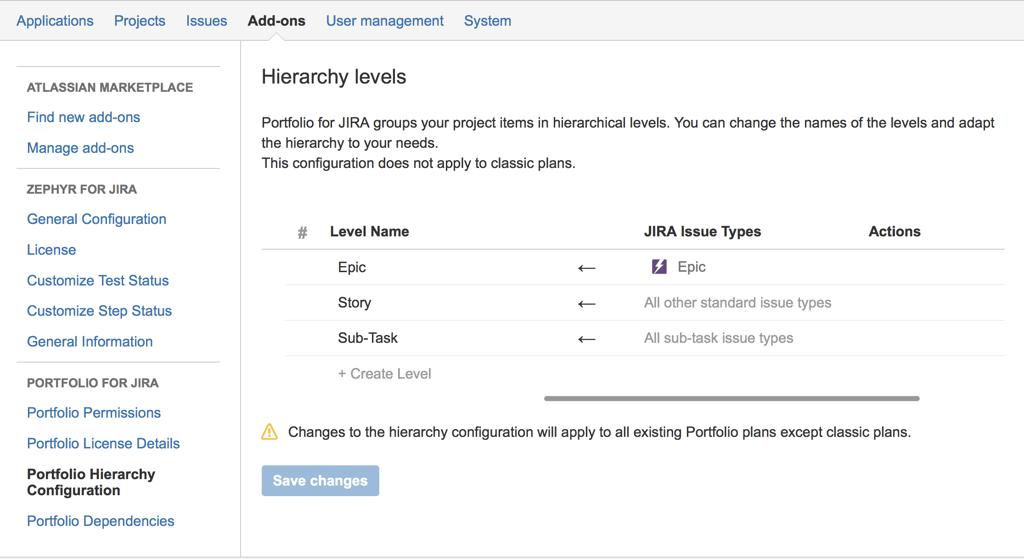 To change the hierarchy, go back into the JIRA Administration console, navigate to the Add-ons options where you updated JIRA, and use the left navigation and click "Portfolio Hierarchy Configuration". You can also add and remove types of dependencies between issues (such as blocking, related to, etc.) by clicking "Portfolio Dependencies" in the left navigation.
Overall, Portfolio 2 looks like a significant upgrade over its previous version. It is unfortunate there was no upgrade path for classic plans, as a lot of work can go into configuring your plan. All of the new features, the tighter integration with JIRA boards, the easier learning curve, and the powerful sandbox created by committing changes seems to make Portfolio 2 a great tool for managing your teams' backlog.
As Atlassian Experts, CirrusLabs provide a full range of services to help you get the most from your Atlassian implementation. We can offer help installing or migrating to Portfolio for JIRA 2.0, configuring your JIRA projects and Portfolio, and we offer training in JIRA and Portfolio.
Learn more about modernized technology here:
Interested in training to help advance your agile journey? Click the button to view our current list of public training courses! Use code BLOG10 for 10% off!


